Monday, February 28, 2011

Completely Obsessed 2

Hey everyone! I hope you all had a wonderful weekend! We had a great time over here. =)
Now, I'm sure I am late to the game with this obsession, I really just "discovered" it in the past week or two.
Heather Ross fabrics: specifically her line Far Far Away 2. Wow. It is AMAZING. There, I said it. I have been able to acquire two yards from this line through etsy so far. Look, just look.


I love everything about  these fabrics, of course the drawings and themes, the muted colors, the weight and feel of the linen. OMGosh you don't even know. Wouldn't they be perfect in a little girl's room? Or I could just keep them for myself haha.
I broke down the other day and ordered two more half yards from this line, and a fat quarter from her Far Far Away line from etsy. I literally couldn't help myself. Haha I won't be buying more fabric for awhile, because as beautiful as this fabric is, it's pricey too. But I'll post pictures when the other fabrics arrive! =)
Oh, and on a sewing note, I have little man's quilt almost all the way quilted. Hopefully I can finish up the quilting before work today, bind it before work tomorrow, and be done. Cross your fingers for me!

Thursday, February 24, 2011

Just babbling a little

I started sewing in the beginning of October. As you guys might remember, my first project was the Halloween quilt that I posted pictures of here. I have to admit, that while piecing that quilt, I don't think I pressed the seams once. I kinda of just skipped right over that whole thing. Too lazy, I didn't want to stop actually sewing..that kind of thing. In the short time and small amount of projects I have actually completed, I've learned that the pre washing, pressing, cutting, pressing, pressing, pressing again, are all important steps in the process of sewing.
The most surprising part of that is that I'm actually enjoying those extra steps in the process, whereas before I dismissed them as boring, or unnecessary, or just yucky. Since October, I have learned yet another big lesson in patience. And I'm loving the look of a freshly pressed seam, not gonna lie.


Side note, even on the wrong side of the fabric those robots are adorable. ^ 

Wednesday, February 23, 2011

What have I been doing the past couple of days?

I'll tell you what I've been doing..piecing a quilt top for my little guy that's what!
I woke up on Tuesday morning at a ridiculously early hour. So I decided that, instead of sulking over being awake so early, I would be productive. And I was. I got all the fabric pre-washed and ironed before 10am. All the fabric was cut immediately after wards, and then I pieced the whole quilt top before we went to pick little man up from school. Yay, go team me. I took the pictures before adding the final white sashing to either side. Sorry, but you get the idea.


I used the free pattern so kindly offered here at Made by Rae. Now I just have to get all the layers together, quilt, and bind it. Easier said than done but I'm excited about it. I really like how the white sashing contrasts against the colors of the blocks. I showed the top to little man and he is super excited. And I let him pick out the backing fabric, he picked out flannel hot wheels fabric haha. Such a boys boy.

Monday, February 21, 2011

Modified Crochet Hook Case

Hello everybody! Happy Monday! It's actually a very happy Monday for me because as of 6 this morning, I completed 3 days of 12 hour shifts and it is now my time to relax. Woohoo. Okay, so do you remember my crochet case tutorial? You probably didn't see it, because all of three people were reading my blog back then. haha. As if I'm queen of the internet now. ;-)
Anyway, so the crochet case tutorial, right. Well, I did that and I've been uploading photos of any completed projects to my facebook page too. Wouldn't you know someone actually wanted me to make them one?! AND they are going to PAY for it?!? Amazing. I am so flattered. I spent some time today and made it for her. Also, I actually added an attached closure to the case, because on the one I made for myself I did not and have just been using a ribbon. I also widened the little pocket for the yarn needles because I have found with the one I made for myself it was a little difficult to get the needles out. With all that said, check it out:


I actually am really proud of how it turned out, and I hope she likes it!  

Sunday, February 20, 2011

Jay's blankie all fixed!

Hey, so I just finished fixing up Jay's baby blankie. =)
I thought I'd post some pictures quickly. It was actually very easy to fix, even though I was super nervous about patching holes in a crocheted blanket because I'd (of course) never done it before. That was actually the quickest part. I kind of powered through the crocheting tonight in an effort to get it all done. My hand is sore. haha.

see where the hole was?


the new border

So yeah, nothing fancy or incredibly difficult, but another finished project!
 I think he's happy =)

Saturday, February 19, 2011

The ruffled scarf

 As promised, here are some pictures of the ruffled scarf. I'm just not even feeling excited about it unfortunately. But you might like it!
wow, sorry this is sideways, for some reason blogger won't upload it the way I have it in my computer. weird.

Well, if you do like it and are interested in making it, the good news is it's really easy. You will need your fabric of choice and elastic thread. I had a yard of seersucker and only used a little over a half yard worth.
1. Cut two strips from your fabric of choice 9" wide by 42" long. If you have enough length just cut one strip 9" wide by 84" long.
2. Join the two strips together
3. Finish the raw edges all the way around
4. Hand wind elastic thread onto a bobbin. Make sure you don't pull it taught, it need not be stretched out.
5. Set your sewing machine tension to the highest it will go (mine was 9), and make your straight stitch the longest it will go (mine was 5). Straight stitch down the middle of the scarf, back stitching at beginning and end.
That's it. So easy. I just wish the ruffle was more like "BAM! I'M A RUFFLE!" I even did two extra lines of the straight stitching on either side of the first line to try and make it more ruffled, but it didn't really make it more defined which is why I left it out of the five whole steps it took to make it.
Meh, oh well, live and learn right.

Friday, February 18, 2011

Not much to say today

I finally made the ruffled seersucker scarf that was inspired by one I saw at  Anthropologie last summer. I like it, but I'm not crazy about it. Maybe if I had used a slightly thicker or stiffer woven fabric it would have shown off the ruffles more. I forgot to take picture of it so far, but I will try to remember tomorrow. Almost hubby is now sick with an ear infection and eye infection, so he is stuck at home tonight while I work. He thankfully went to the doctor today and got antibiotics and eye drops, so hopefully it helps and quick because he is miserable =(.
In other news, I'm also fixing a friends crocheted baby blanket for him. It is 27 years old and I think still very much loved. So, it is definitely worn out. So far I had to remove the outer border, and I fixed several holes, and now I'm re-adding a border back on. I'll post pictures when it's all done. =)
Side note, look at my creepy cat. She laid like that for twenty minutes without moving. Bahahahaa


Tuesday, February 15, 2011

How I Attach Quilt Binding

Hey guys, so I'm sure you'll be happy to see that I finished Chelsea's quilt yesterday! wooohooo! I took a couple of pictures of it so you all could see.


Basically all I did was the quilting and I prepared and attached the binding. For most people who sew that would have probably been a much quicker turnaround, but I'm slow and had trouble completely focusing on one project (of course). BUT the important thing is it's done, Chelsea just picked it up and she loves it! YAY!

I thought I'd show you all how I attach the binding. I know there are a bunch of different ways to do it, and this is the way I have found works for me. I tried to take clear pictures along the way, but if anyone has any questions or something is unclear I'd be happy to try and make sense of it for you. =)

Okay, so hopefully you already have your quilt binding prepared. If not, go ahead and check out how I prepare my quilt binding .
Alright, so first what we're going to do is sew the raw edge of the binding onto the outer edge of the quilt top using a quarter inch seam. I usually like to put the start of the binding in the center of the "bottom" of the quilt. When you line the beginning up with the middle, leave an extra 5-6 inches tail or overhang.
Okay, so we did that, now we can start sewing. Again, sew with a quarter inch seam around, and don't start right in the middle of the bottom of the quilt or at the end of your binding. Again give yourself at least 5-6" and start sewing there. Be sure to back stitch at the beginning and end.

Stop sewing a quarter inch away from your first corner. Back stitch to secure.

Now, to make a mitered corner:
Take the tail or unsewn portion or the binding and fold it up to create a 45 degree angle.

 Then, while maintaining that angle, fold the tail back onto itself and line it up with the un-sewn edge of the quilt.Make sure you pin it in place. It should look like the bottom photo if you pinch it up like I did. =)

Okay, so basically you then start sewing a quarter inch away from your mitered corner ( remember to back stitch at beginning and ends) using a quarter inch seam all the way around. Repeat the steps for the mitered corner at each corner.
When you get close to where you started sewing at the beginning, get ready to join the two ends. I have seen a few ways to do this, and I have found this way to be the least amount of hassle and with a good result.
Remember that in the beginning we had extra binding from the start of stitching and didn't start right in the middle? This is where all that becomes useful. Basically what we're going to do is tuck the end of the binding into the start of the binding.
You will have all this extra binding meeting up together. Don't panic, it's okay.
What you want to do is from the middle of the bottom area, trim up  the beginning of the binding, leave about 1.5-2" extra from the middle of the bottom. Fold over the extra inch or two onto itself.

Now trim up the other end of the binding and tuck it inside the beginning binding. Pin, and sew to quilt top using a quarter inch seam, back stitching at beginning and end.

Cool beans, we did that. See how it looks pretty seamless already? Yay, go team us. Now I like to hand stitch that joining point and the mitered corners at the end to further secure them. Just a side note.
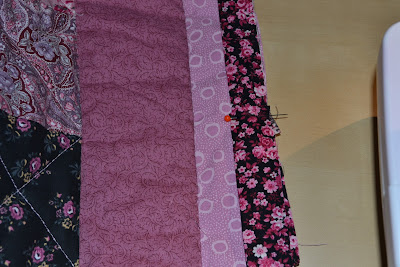
Okay, so now flip the quilt over and turn the binding over to the back side. If you are going to machine stitch it on, go ahead and pin all the way around the quilt making sure to cover up the stitches from joining the binding to the front.

Then, from the front, "stitch in the ditch" all the way around, back stitching and beginning and end. Be sure to take your time and check frequently that you are in fact catching the back of the binding.
OR- you could hand stitch the binding to the back of the quilt. This, of course will take longer, but will probably leave a more polished and professional finish to your quilt. I have not yet used this method, so I really can't comment too much on it. Make sure you tack down your mitered corners and the joining point of the binding.
Taa Daaaa! We're finished.
I hope you enjoyed this little how-to. If there's anything that you didn't understand please let me know and I'll try my best to better explain it. =)

Monday, February 14, 2011

Happy Valentines Day!!


Happy Valentines Day everybody! I hope you all had a fabulous weekend, I myself actually had a stomach virus which was absolutely awful. But I woke up today and am feeling almost normal which is great. I'll take it.
Unfortunately, Friday turned into a no sewing day- but for good reason. We, well mostly the boys, re painted the sewing/ guest bedroom. Now it's kind of purple y and I love it. I was on picture duty.


So, yay, today is Valentine's Day! We actually celebrated yesterday because we work tonight and therefore do not have little man, he's with his mom. Even though I was sick as a dog it was still really nice. I gave almost hubby a gift card to Best Buy ( kind of a joke though, because he is so indecisive when it comes to big purchases, and he goes back and forth and back and forth..so it's money towards whatever he eventually decides to do haha) and I posted little love notes all over the house.

This particular one is on the mirror in the dining room and says " I love that I am still so in love with you. " 


I also gave him a stitched love note, from Flamingo Toes 's awesome tutorial. It was my absolute first time attempting embroidery, to be honest I don't even know if what I used was a real stitch or not. haha. But I like it, and more importantly, so does he. 


I hope you all have a great day! I will be binding Chelsea's quilt finally now that I'm not getting sick every two seconds. =)

Thursday, February 10, 2011

How I Prepare Quilt Binding


Hey all, sorry for my absence the past couple of days..this week has kind of flown by. BUT guess what?!?! Almost hubby and I did get something fancy and awesome-- a brandy new camera. A Nikon D3100. Oh my gosh, it takes really awesome pictures and has amazing features that I never even dreamt of. haha. But really, all we've ever had were point and shoot cameras, so this is awesome. And we both have a lot to learn on it, but so far we love it. =).
Okay, so I'm sure you'll all be relieved to hear that I finished quilting Chelsea's quilt, and tied off all the threads. Whew, thank goodness right? I prepped the binding today, and will (hopefully!) be actually binding the quilt tomorrow. I thought I'd show you how I like to prep the binding. Now, let me preface this by saying that I am obviously by no means an expert, that there might be (and probably are) better ways to do this, and I'm sure that I'm not the first to do it this way..but in case you're interested I'll show you anyway.
  Unless I am doing a curved edge I don't really think it's necessary for the strips to be cut on the bias. Again, I am not an expert =) For this quilt I'm doing mitered corners, and the fabric doesn't need to be stretchy for that. Now, normally I would cut long strips of fabric 2.5" wide. In this case, however, Chelsea's grandmother already had cut binding strips, they happen to be 2" wide. No biggie, we can definitely make it work, I just have to be more precise when binding the quilt.
Okay, so we have these strips of fabric. In order to make the binding long enough for your project you will probably have to join multiple strips together. Place the ends of two strips of fabric, right sides together forming the shape of an upside down and backwards L. Like this:

Next you need to sew the strips together using a straight stitch.

After that, trim the excess length off the edge for about a 1/4" seam allowance.Open it up and admire how easy it was.

 
Now we need to press the binding in half, wrong sides together. The great thing about joining the binding strips this way is that the seam kind lays itself out nicely without having to press it flat. 


 Finally, if you're like me and do things right before work, therefore you don't have enough time to finish things..find a little piece of cardboard and wrap your newly pressed binding to keep it safe. Leave it in a visible place so it jogs your memory to finish your project. If you aren't like me then go ahead and bind your quilt. If you want to see how I do it, I will post that tomorrow. Enjoy.