Monday, January 31, 2011

New red scarf!


Hi everybody! I hope you all had a fantastic weekend! Remember this fabric? :
Well...I turned it into this:

I used the awesome tutorial by Ruffles and Stuff for the scarf. The tutorial is awesome and so easy to follow. If you haven't checked it out yet, please do, this woman is very talented. =). I had to modify the tutorial a little bit, only because I didn't have enough fabric. Which was completely my own fault because I didn't calculate the measurements of what was needed for the scarf before I bought the fabric. So, in the original tutorial, you need a length of flannel measuring 10"x 175". I shortened the width by two inches and didn't have enough length anyway so I ended up with about 8"x 130". Instead of four inch box pleats I made 3 inch box pleats to try to make up for my lack of length. Also, on either end, I just used a single pleat instead of box pleats for the extra couple of inches. Even though I kind of improvised, I still really like how it turned out.
It will be a welcome addition to my scarf collection. =)

Thursday, January 27, 2011

Kitties and Books


I'm happy to report that Maxine is home and still her normal self. Our other cat, Piglet, is grumpy again now that Maxine is home, so all is good with the world. =)
Yesterday I got an awesome package in the mail from Amazon.....


The Art of Manipulating Fabric by Colette Wolff AND Pattern Magic by Tomoko Nakamichi (!!!!!!!!!!!!) Gahh, I'm so excited! I also ordered More Pattern Magic, but it won't be arriving probably until late February. Oh, another plus, Pattern Magic is now translated to English, so for those of you like me who don't read Japanese, no worries! I spent what little free time I had last night flipping through the books, but I didn't have a real chance to read them yet. Can't wait... =)

Wednesday, January 26, 2011

Murr on a stick

BAH! I know I just posted. But really, jeeeeeezum. After my last post, I was like oooh why don't I quilt some more?!? What an awesome idea! And there I went happily, until I looked up and realized I am almost out of thread. Poop! And of course I didn't have the forethought to buy extra of that color, soooo I will be taking a trip to buy some more. And it's snowing pretty steadily here, so do I really feel like going now..nope!


On the upside, I did re organize my patterns. And I found a better home for all the elastic and zippers and lace and ribbon that I have. Also, I'm currently pre-washing fabric. yay! So really, it's not a big deal at all. haha.

bad little blogger, good little quilter

Alrighty, it is Wednesday already? That's absurd. hahaha. This past weekend was my rotation to work, so Friday, Saturday, and Sunday. But I actually felt so awful and sick that I called out of work on Sunday and laid on the couch like a feverish blob. I think I might have bronchitis, but I'm not sure, should really go to the doctor and get that taken care of. Lemon tea with honey has been clutch recently, that's for sure.
awww look how little she used to be!
Also, yesterday we dropped off our lovely Maxine to the vet to be spayed, poor thing.
So for my lack of feeling up to do anything, on Monday I still managed to quilt a little bit.  I'm really determined to get Chelsea's quilt done. And really, there's not a horrible amount to do, life just isn't cooperating with me. (Everything should revolve around what I want to do, right?) I got into a really good groove too, I put some music on and went to town. But then after an hour or so, I had to go run errands and actually address life so yeah. I did promise pictures of things that I bought at Joann's though so let's see:


These are the two patterns that I got for 99 cents each! Yay!!!! I think they are so cute!


This is the pretty red flannel and the buttons for this scarf.

Next, let's see...oh the green and white seersucker and elastic thread for the ruffled Anthropologie scarf that I want to make. Does anyone know which scarf I'm talking about? I can't find a picture anywhere, sorry!


Last but not least, aside from decor items which I will post pics of another time, here is a simple black 5x7" frame that was 40% off ( I think!), with a plain white fat quarter.. I will be using these to make this stitched love note for almost hubby. ( side note...you can kinda see me and the camera in the reflection of the plastic wrapping over the frame..haha creepy) So, as I go and make progress on these projects, or anything else, or course I will post and update and stuff. I can't wait until spring by the way, I want to take pictures outside! (well and do many other outdoor activities..not just take pictures =) )
Okay, so before I go, I have been considering what I want this blog to really turn into.. other than a way to showcase and talk about things I've made, like to make, etc.. what else are my goals? I haven't quite figured that out yet to be honest. BUT-- I've been thinking about doing themed days, stick with me here. Things like: Made by Me Monday, Want it Wednesday...that sort of thing. It will take a bit more planning and work on my part, but I think it could help keep the blog interesting, and give me something to work towards a little more specifically. I don't know...tell me your thoughts please! I'd love to hear from you!

Friday, January 21, 2011

goodies and more goodies

Oh my gosh, do I love a good sale. Yesterday we went over to Joann's (umm which is sadly the only fabric store that I know of close by), and I picked up some great stuff, all on sale by the way which was just wonderful. I got a yard of green and white striped seersucker and elastic thread with plans to make a ruffled summer scarf that I saw at Anthropologie last summer on clearance..for I wanna say thirty dollars? or some price that is completely absurd. That was before I started sewing, and even then I said "wow-I could so make that." I also picked up a nice bright red flannel, with plans to make this scarf. I bought two simplicity patterns for a whopping 99 cents each, some more elastic on sale...and some really nice decorations for the sewing room (erm..guest bedroom). Pictures to come!

Scarf!


Today almost hubby and I visited his father, most widely known as Pop. I made him model the scarf I crocheted for him for his birthday! It's a little hard to tell from the picture, but it's a crocheted cable in the middle, which consists of crossing over front post and back post extended double crochets every few rows. I learned to do it here. It is from twj1963's channel on you tube. Believe it or not, her channel is where I learned  how to crochet at all- I mean I knew NOTHING. These videos are really awesome, so easy to follow, and yeah, what can I say... she's awesome for making them! yay!
On a side note, I'm fully aware that my pictures on here need some help. More natural light, taken with a real camera and not a phone, this would help significantly. I'm working on it, I promise. =)

Wednesday, January 19, 2011

Got myself a cute little summer shirt!

Hey guys! SO remember that blue striped XXL t shirt I talked about? Well I got brave and cut it up today! Woohoo! I'm sorry because I completely forgot to take pictures along the way, but imagine a plain long sleeve crew neck shirt in about three sizes too big. Got it? Okay, that's what I started with. Basically what I did was cut the sleeves to be short sleeves, cut the neck line to be more of a boat neck/scoop neck so it would go off my shoulder a little. I cut off about 3 1/2 inches from the bottom, and took a good 6 inches off the sides to fit it to my body a little better. Then I hemmed all of the newly cut edges. After that, I decided to make a little makeshift bow and I hand sewed it on with a vintage yellow button in the center.  Here's how it turned out:


Do you like it? I do, I would definitely wear it over a tank top though because the neckline can be a bit showy. haha. Oh and by the way, this was my absolute first time working with a knit, EVER. It's far from perfect, but I'm pleased.  So yeah, it was a really easy and fast project, and now I have a cute little very casual summery shirt. yay.

Monday, January 17, 2011

Had an awesome weekend with the boys..

Hey everyone, hope you all had a great weekend! I don't have very much sewing related stuff to talk about, except I did work a little more on Chelsea's quilt. If I had one day, a whole day with nothing else to do I'd have it done in a flash haha..but that is soooo not realistic. I will be preparing the quilt binding soon, so I could post a tutorial on that if anyone is interested. So, I will be starting another quilt project as well once Chelsea's is done, per special request from little man. He asked me to make him a quilt to snuggle with. =). So of course I have to do it. The other quilt top may have to wait, especially since it's irritating me haha.
Today almost hubby and I went over to Old Navy and I picked up a long sleeve striped t shirt in size XXL for 3 dollars with the intention of cutting it up and making it into something else. I figured the more fabric the better. =)
Sooo anyway, yeah. So many plans, so little time.

Friday, January 14, 2011

Crochet Case Tutorial


Hey guys! Yay it's finished! Soooo below I'll post the way I did it in case anyone else would like to make it. (sorry about the pictures they were all taken with my I phone)

Materials:
-one fat quarter of a fabric that you like for the main piece
-a fat quarter or even scraps of another color (mine is a heavier weight quilting cotton)
-coordinating thread
-a button
-and the normal sewing tools, scissors, a sewing machine, a buttonhole foot would be useful...etc.

Okay so first, at least what I did was lay out everything on top of the fat quarter to see how I kind of wanted it to be laid out.

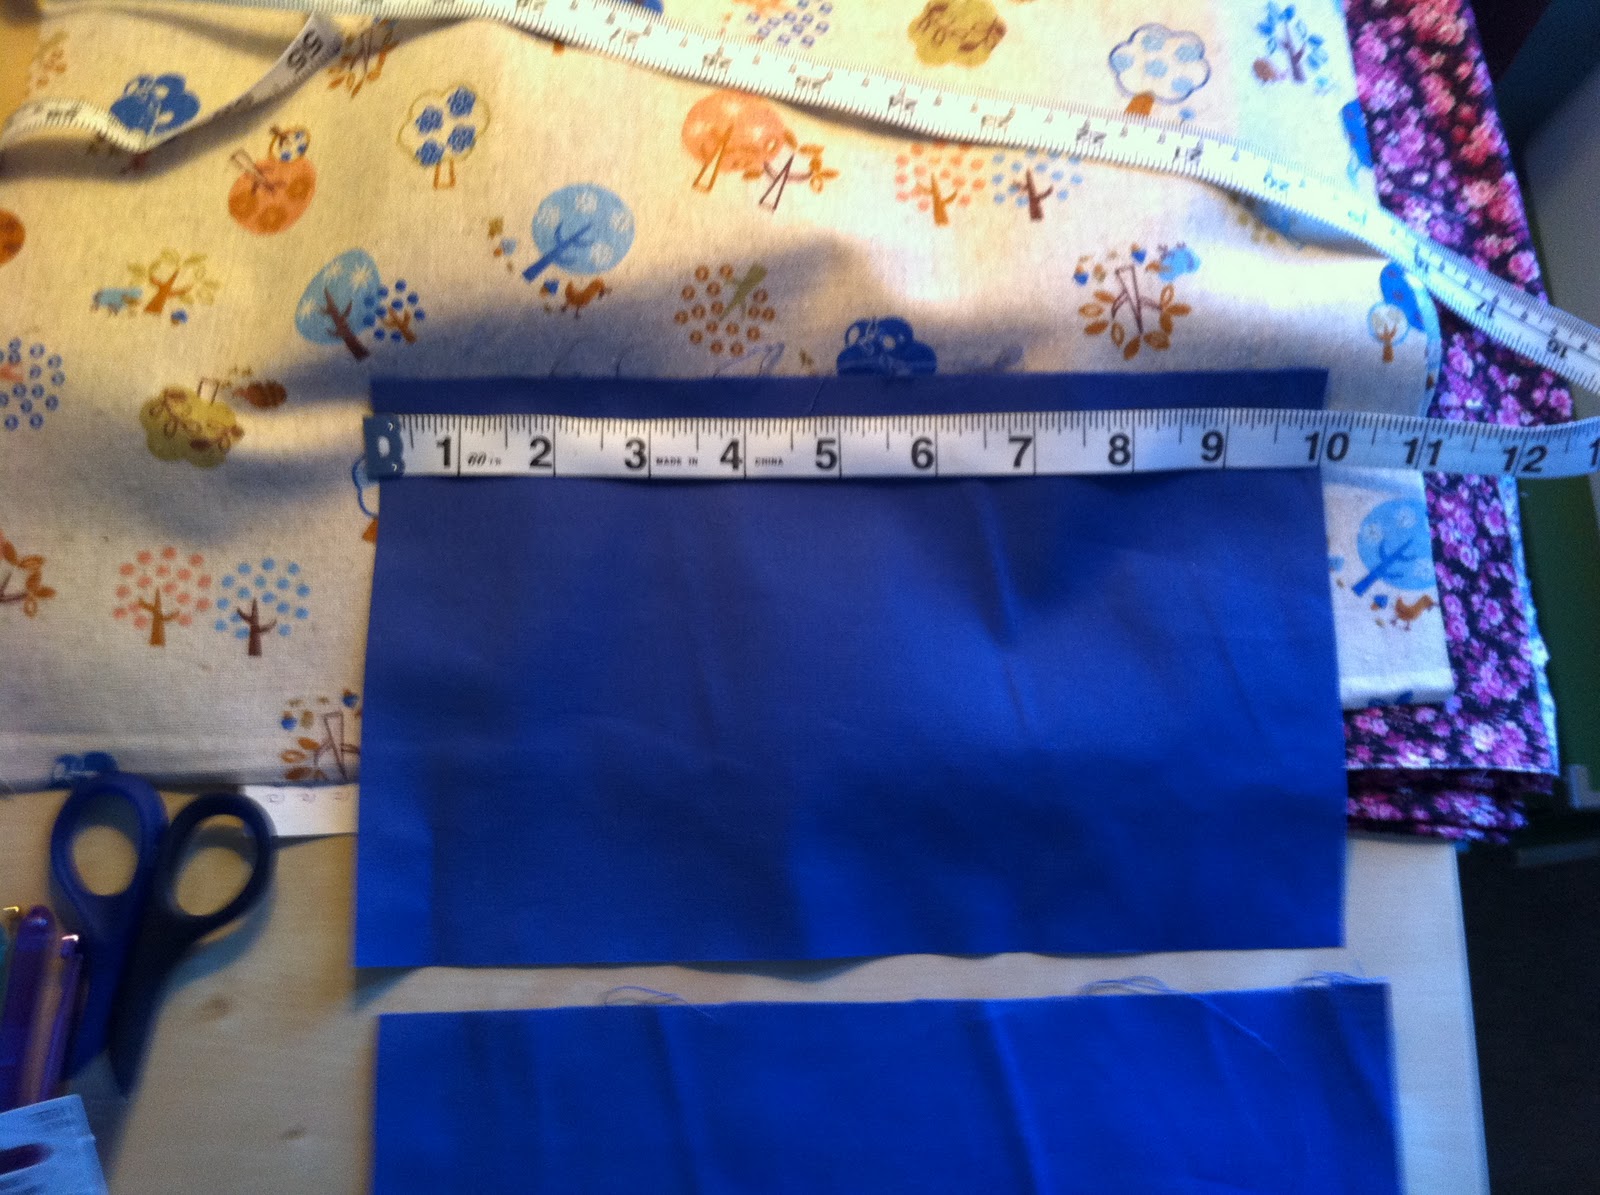
Then I cut the fat quarter into two equal rectangles, which ended up equaling about 15.5"x10"


this was supposed to be the two 5"x2" but I cut it on the fold so that's why it's just a strip
Next I cut into the blue fabric. I needed two of each: 10"x6", 5"x2", 2"x4", 2"x3". Make sure when you cut the 10"x6" pieces that you cut selvage to selvage so that it has some stretch. You will need the stretch later.


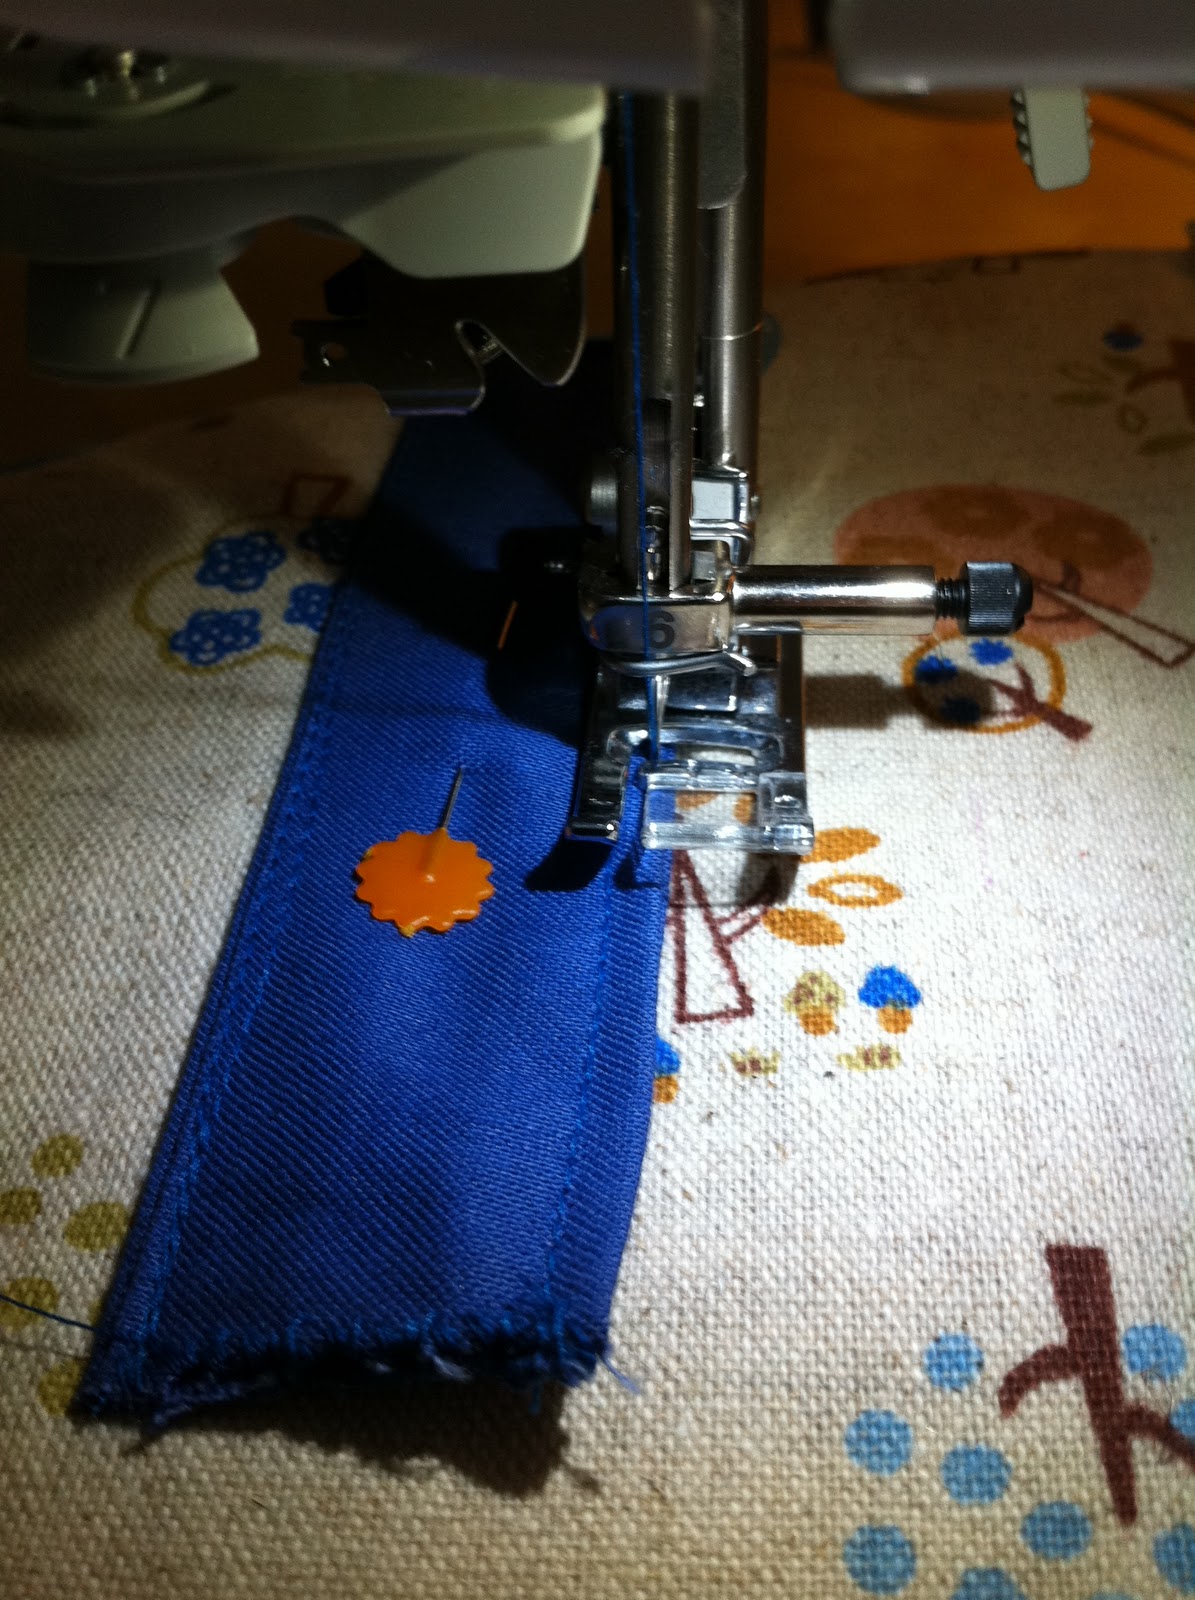
Now start assembling the little pieces. Sew all equal pieces right sides together, leave an opening, turn right side out and then edge stitch all around to close up the opening. Make sense?  Okay, do that with all of the pieces.Also, I used a 3/8" seam allowance for everything. If you want a bigger one, you just need to accommodate that with the size of the pieces you cut.

With the 2"x3" pieces, after they are sewn, and edge stitched you need to sew a buttonhole. This will be the closing flap for the 2"x4" pieces (a little pocket for yarn needles).Once you do that, sew the button onto the pocket part. (I forgot to take pictures of that but it seems pretty self explanatory. =)  )


Next, once all of the littler pieces are assembled lay them out on one of the 15.5"x10" rectangles. Decide where you want everything to go. Pin, and stitch around over the previous edge stitching on three sides only, not the top.. Do this for the 10"x6"  rectangle as well.

Okay, here comes the part that I was dreading, and guess what-it wasn't bad at all. After the 10"x6" rectangle is sewn on the three sides to the backing fabric, we need to start sewing the lines to separate the needles and keep them organized. I started with the largest hook, N. Simply place the hook into the pocket with the "hook" part sticking out of the top. Push it with your finger towards the closed edge to make it snug and then pin on the other side. Remove the crochet hook and then sew in a straight line to the bottom edge, lift your presser foot, spin the fabric around, and sew up the line you just sewed.


Continue this process with all of the crochet hooks you have, one after the other. I liked to check after each line to make sure the crochet hooks were fitting right. Oh also, a little tip, you know how crochet hooks have little flatter parts for the thumb? Well, I call them a thumb grip. Anyway, pin on the side on the thumb grip, not higher or lower. The thumb grips are a little wider than the rest of the hook, so you want to make sure you accommodate for that. Do as I say not as I do in the picture with the pin in it =), that hook is a little bit too snug because I didn't follow my own instructions.

Once you finish with all of that, remove all of the crochet hooks, and whatever else you put in there haha, and take the other 15.5"x10" piece of fabric that you cut earlier.. Sew the two rectangles, right sides together, leaving an opening big enough to turn it right side out. Don't forget to clip your corners!


Turn it right side out and edge stitch all the way around to close up the opening. At this point you can decide how you want to officially close it, or of you want to fold it or roll it. I considered a big button, velcro, or just a tie. For now, I chose just to use a pretty blue ribbon, because it makes me happy. =)
I hope you enjoyed this tutorial. If you have any questions or constructive criticism please let me know, I'd be happy to hear from you!

Thursday, January 13, 2011

awesome giveaway on Grosgrain!

Hey--did you guys see this awesome giveaway at Grosgrain? It's for her fabulous shoe sugar month! If you don't know about Grosgrain yet, check it out--this woman is super talented, creative, and kind enough to share her great ideas and tutorials with us =) Honestly, especially her blog, really inspired me to not only start a blog but to actually start sewing! Yay!